
Introduction
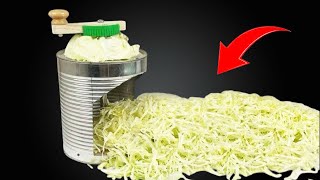
A homemade cabbage slicer made from a tin can is a clever DIY kitchen hack that can help create thin cabbage strips for salads, coleslaw, kimchi, or stir-fry dishes.
This simple project uses recycled materials and basic tools to create a lightweight manual slicer.
⚠️ Safety First
Tin cans have very sharp edges.
Before starting:
- Wear gloves if possible
- Handle cut metal carefully
- Smooth sharp edges after cutting
🧰 Materials Needed
- Empty tin can
- Sharp utility knife or metal cutter
- Sandpaper or metal file
- Pliers
- Wooden board or handle (optional)
🔧 Step 1: Prepare the Tin Can
- Wash and dry the can completely
- Remove the label
- Carefully remove the top and bottom if needed
👉 Make sure the metal is clean and safe to handle.
✂️ Step 2: Cut the Blade Slots
Using a cutter or metal tool:
- Create narrow slits in the side of the can
- Slightly raise the metal edges outward
👉 These raised edges become the slicing blades.
Tip:
Keep blade openings small and even.
🪛 Step 3: Smooth Dangerous Edges
Use:
- Sandpaper
or - Metal file
to smooth any sharp outer edges.
⚠️ Only the slicing area should remain sharp.
🥬 Step 4: Test the Slicer
Hold the can firmly and slide cabbage across the blade openings.
👉 Thin cabbage strips should come out easily.
🔥 Optional Upgrade: Add a Handle
For safer use:
- Attach the can to a wooden board
or - Add side handles
This improves stability and control.
💡 Useful Tips
- Use light pressure while slicing
- Make blades evenly spaced
- Wash and dry after every use to avoid rust
🍽️ Great For
- Coleslaw
- Kimchi
- Stir fry vegetables
- Lettuce slicing
- Thin vegetable cuts
❌ Common Mistakes
- Blades too large
- Uneven cuts
- Leaving dangerous sharp edges
- Using rusty cans
🧠 Conclusion
A tin can cabbage slicer is a simple and creative recycling project that turns ordinary waste into a useful kitchen tool. With careful cutting and proper safety, you can create an effective manual s